Effortless Cool Rise Sandwich Bread: Master the 15-Min Prep & Overnight Flavor
Imagine waking up to the promise of freshly baked bread, filling your home with an irresistible aroma, all while knowing you put in minimal effort the day before. This isn't a baking fantasy; it's the everyday reality for those who embrace the magic of
cool rise sandwich bread. This revolutionary method transforms bread baking from a time-consuming chore into a convenient, hands-off process, yielding loaves that are not just delicious but deeply flavorful and wonderfully textured. Forget complicated schedules and multiple rising stages; with just about 15 minutes of active preparation, you can set the stage for a spectacular loaf that practically bakes itself while you sleep.
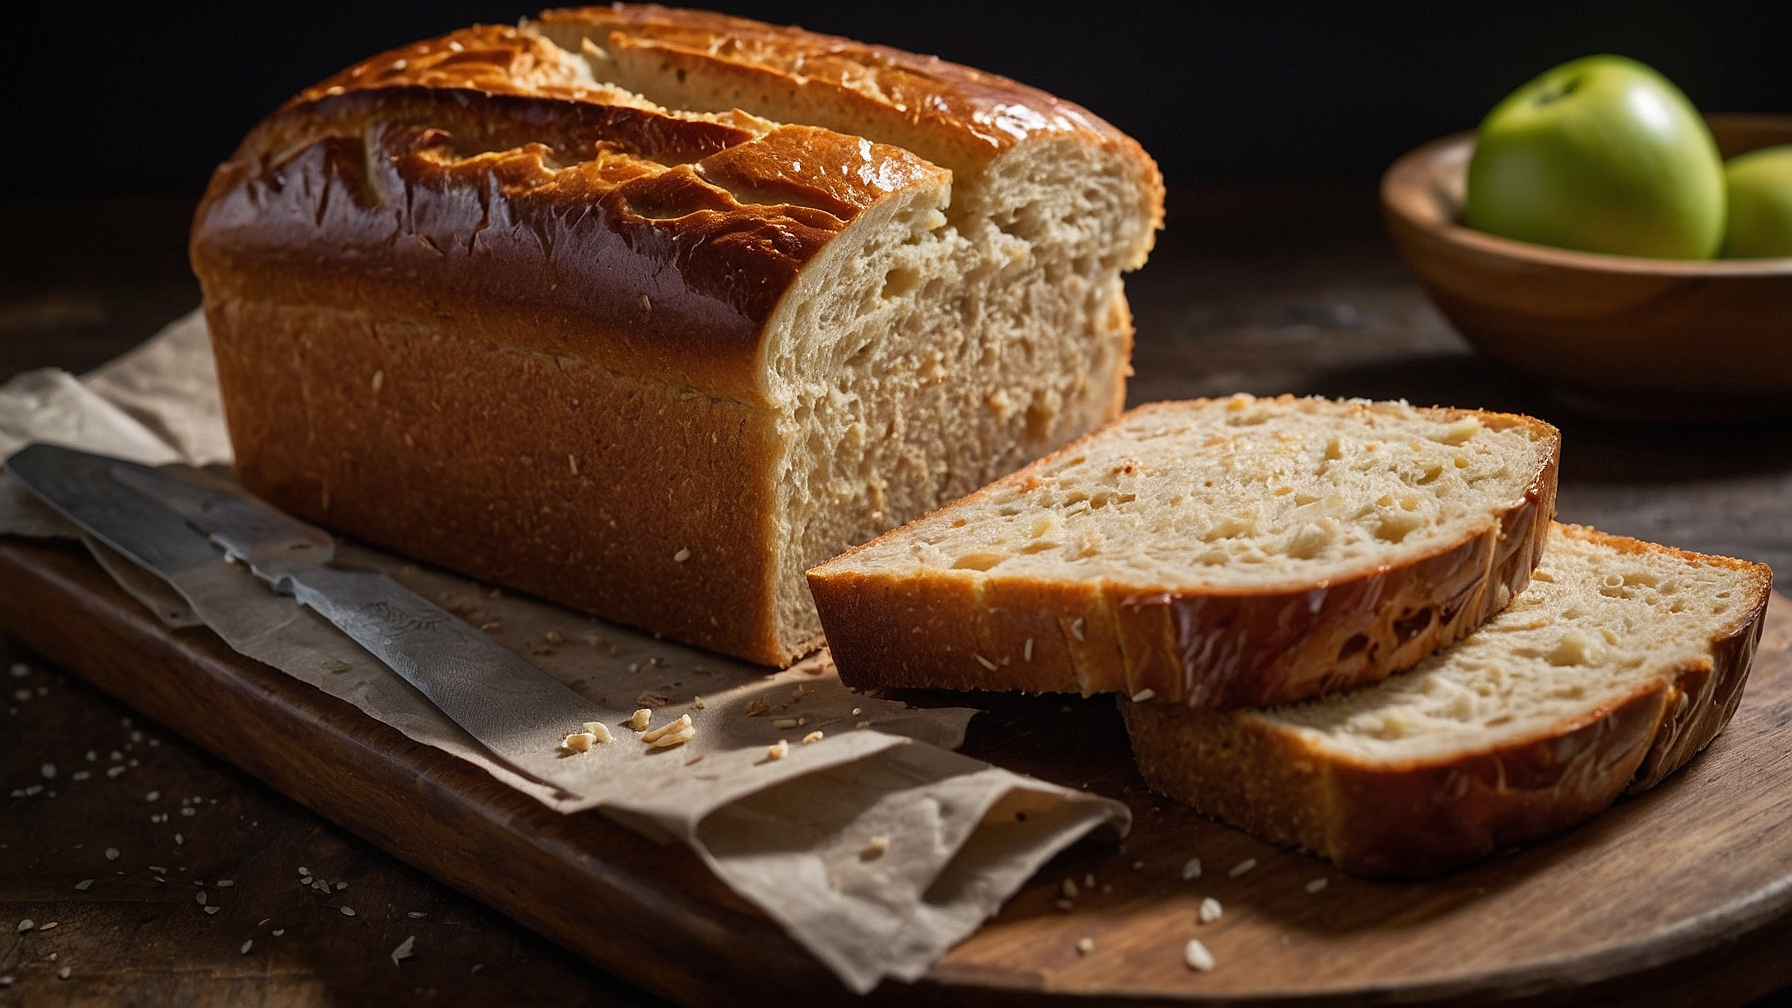
The beauty of cool rise bread lies in its ingenious use of refrigeration, allowing yeast to work slowly overnight. This extended, cold fermentation period isn't just a time-saver; it's a flavor enhancer, developing complex notes often missing in quick-rise loaves. The result? Soft, sturdy slices, perfectly adaptable for any sandwich filling imaginable, an ideal companion to your morning toast, or a delightful side for any meal. If you've ever been intimidated by yeast or the perceived complexity of homemade bread, this method is your gateway to becoming a confident baker.
The Magic Behind Cool Rise: Why It Works So Well
So, what exactly *is* a "cool rise," and why does it produce such superior bread? At its heart, the cool rise method leverages the power of cold temperatures to slow down yeast activity significantly. Unlike traditional bread recipes that demand multiple warm rises, causing yeast to multiply rapidly, a cool rise allows for a prolonged, gentle fermentation. This slower process is where the true magic happens.
Here's why it's a game-changer:
*
Deepened Flavor Development: When yeast ferments slowly in the cold, it has more time to break down complex carbohydrates into simpler sugars. This enzymatic activity creates a broader spectrum of flavor compounds, resulting in a bread with more nuanced, almost nutty notes that are simply unparalleled. Think of it like slow-cooking a stew versus quickly boiling it – the longer, slower process always yields a richer taste.
*
Superior Texture: The extended fermentation also gives gluten, the protein structure in flour, ample time to relax and develop. This leads to a more elastic dough and, consequently, a softer, chewier crumb with a finer, more even texture in the final baked loaf. You'll notice a remarkable difference in how the bread holds up to fillings without becoming soggy, making it truly ideal for sandwiches.
*
Unmatched Convenience: Perhaps the most significant advantage for busy home bakers is the scheduling flexibility. Your active time is concentrated into a mere 15-20 minutes of mixing and kneading. After that, the dough rests in the refrigerator for 8-48 hours (or even up to a couple of weeks, as some recipes allow for the base dough!). This means you can fit bread making into your schedule whenever it's most convenient, prepping on a Sunday evening for fresh bread all week. It turns a multi-hour commitment into an effortless, bake-when-ready affair.
*
Reduced Stress and Better Results: Many bakers find the constant monitoring of warm rise times stressful. With cool rise, you simply mix, cover, and refrigerate. The cold acts as a natural retardant, making it far more forgiving if you can't bake it exactly when planned. This hands-off approach fosters confidence and consistency, ensuring successful results every time.
To learn more about mastering this versatile technique for various applications, check out our guide on
Master Cool Rise Bread: Soft, Sturdy Slices for Any Meal.
Your Path to Perfect Cool Rise Sandwich Bread: A Step-by-Step Guide
Embracing the
cool rise sandwich bread method is surprisingly straightforward. The key is in the initial mixing and allowing the refrigerator to do the heavy lifting. While specific ingredient ratios may vary slightly from recipe to recipe, the core process remains consistent.
Here's a general roadmap to creating your own delicious cool rise loaf, focusing on that minimal active prep:
1. The Active Prep: 15 Minutes to Glory
This is where your hands-on time comes in.
*
Activate the Yeast: Begin by dissolving 2 packages of dry active yeast in about 2 ½ cups of warm water (around 105-115°F or 40-46°C). The warmth helps "wake up" the yeast. Let it sit for 5-10 minutes until it looks foamy, indicating it's active.
*
Combine Wet Ingredients: In a large mixing bowl (or the bowl of a stand mixer), add the dissolved yeast mixture, ¾ cup of oil (vegetable, canola, or a light olive oil work well), ¾ cup of sugar (to feed the yeast and add tenderness), 2 teaspoons of salt (crucial for flavor and controlling yeast activity), and 2 beaten eggs (for richness, color, and structure). Mix these wet ingredients thoroughly.
*
Incorporate Flour: Gradually add 7-8 cups of all-purpose or bread flour, one cup at a time, mixing well after each addition. The amount of flour can vary depending on humidity and how packed your flour is, so pay attention to the dough's consistency rather than sticking rigidly to the measurement. You'll want to add *just enough* flour to make the dough pull away cleanly from the sides of the bowl.
*
Knead Until Smooth: Once the flour is mostly incorporated, turn the dough out onto a lightly floured surface or continue with your stand mixer fitted with a dough hook. Knead for 5-7 minutes. If kneading by hand, you’re looking for a smooth, elastic dough. If using a stand mixer, let it knead until the dough pulls away from the sides and forms a relatively smooth ball, but it should still be a little sticky to the touch. This slight stickiness is normal and desirable for cool rise dough.
2. The Cool Rise: Let Your Refrigerator Do the Work
*
Prepare for the Chill: Lightly grease a large bowl with a little oil. Place your kneaded dough into the bowl, turning it once to coat the entire surface. This prevents a crust from forming.
*
Cover and Refrigerate: Cover the bowl tightly with plastic wrap or a lid. Place it in the refrigerator for at least 8 hours, ideally overnight, or even up to 2-3 days for maximum flavor development. The beauty here is its forgiving nature – no need to obsess over exact timings!
3. Bake Day: Shaping and Baking
*
Remove and Warm: On baking day, take the dough out of the refrigerator. It will have risen significantly, though perhaps not as dramatically as a warm rise.
*
Shape Your Loaves: Gently punch down the dough to release the air. Divide it and shape it into loaves. Place the shaped dough into greased loaf pans.
*
Final Proof (Short Warm Rise): Allow the loaves to rise in a warm spot for about 1-2 hours, or until they have nearly doubled in size. This final warm rise ensures a light, airy texture.
*
Bake: Preheat your oven to 350°F (175°C). Bake for approximately 30-45 minutes, or until the crust is golden brown and the internal temperature reaches 190-200°F (88-93°C).
*
Cool: Remove the loaves from the pans immediately after baking and let them cool completely on a wire rack before slicing. This is crucial for texture; slicing too early can result in a gummy crumb.
For those just starting their baking journey, this method is incredibly forgiving and rewarding. Dive deeper into the fundamentals with our
Beginner's Guide to Cool Rise Dough: Easy Baking, Delicious Results.
Elevating Your Loaf: Tips for Cool Rise Success & Customization
While the core recipe for
cool rise sandwich bread is wonderfully simple, a few insights and customizations can help you achieve truly exceptional results and expand your baking repertoire.
Ingredient Insights & Customization
*
Flour Blends: Don't be afraid to experiment! While all-purpose flour yields a classic soft crumb, incorporating whole wheat flour adds a delightful nuttiness and increased nutritional value. You can start with a 50/50 blend (half all-purpose, half whole wheat) as mentioned in the reference context, or even go for 100% whole wheat once you're comfortable. Remember that whole wheat flour absorbs more liquid, so you might need to adjust the water slightly or expect a slightly denser crumb.
*
Sweetener Variations: While granulated sugar is standard, a tablespoon or two of honey or maple syrup can add a subtle depth of flavor and contribute to a more tender crumb and richer crust color.
*
Fat Choices: Different oils can impart subtle flavor notes. Olive oil can add a Mediterranean twist, while butter (melted and cooled) offers a classic richness. For an even softer crumb, consider adding a tablespoon of milk powder.
*
Salt Matters: Don't skimp on salt! It not only enhances flavor but also controls yeast activity and strengthens gluten. Proper salting prevents your bread from tasting bland and helps with its overall structure.
Pro Tips for Cool Rise Mastery
*
Listen to Your Dough: Flour absorption can vary. If your dough is too sticky after adding the recommended flour, add a tablespoon at a time until it's manageable but still soft. If it's too stiff, a tiny splash of water can help. The "clean away from the bowl" rule is key, but remember it should still feel a little tacky.
*
Don't Over-Knead: While kneading is important for gluten development, over-kneading can make the dough tough. Follow the 5-7 minute guideline; your dough should be smooth and elastic, but not overworked.
*
Refrigerator Longevity: One of the most incredible benefits of cool rise dough is its keeping quality. Some recipes, like those mentioned in the reference context, suggest the dough can be kept in the refrigerator for up to two weeks! This means you can mix a large batch and bake fresh bread, cinnamon rolls, hot rolls, or even Bierox (savory meat-filled pastries) on demand over several days. Just pull out a portion, shape, proof, and bake.
*
Temperature for the Final Rise: After coming out of the fridge, the dough needs to warm up slightly and undergo its final proof. A warm, draft-free spot is ideal. If your kitchen is cool, you can preheat your oven to its lowest setting (or just use the oven light) for 10-15 minutes, turn it off, and place the dough inside with the door slightly ajar.
*
Cooling is Crucial: Resist the urge to slice into your hot bread immediately. It's still cooking and setting internally. Letting it cool completely on a wire rack allows steam to escape and the crumb to stabilize, resulting in a perfect texture.
Why Cool Rise Baking is a Game-Changer for Every Home Baker
The journey to baking homemade bread can seem daunting, especially with the complex schedules and precise timings often associated with traditional methods. But with
effortless cool rise sandwich bread, those barriers are wonderfully broken down. This method isn't just about saving time; it's about unlocking a new level of flavor and texture that truly elevates your home baking.
From the minimal 15 minutes of active prep to the profound flavor development achieved through an overnight rest, cool rise baking empowers you to enjoy fresh, wholesome bread with unprecedented convenience. It transforms the act of baking from a rushed task into a calm, rewarding experience. Whether you're a seasoned baker looking for an easier routine or a complete novice intimidated by yeast, this method promises consistent success and loaves that will impress. The soft, buttery, and slightly sweet character of this bread makes it truly perfect for any application, from hearty sandwiches to decadent toast topped with honey butter. Once you try it, you'll wonder why you waited so long to embrace the cool rise revolution.
Conclusion
Embracing the
cool rise sandwich bread method truly redefines homemade bread baking. It's a testament to how simple adjustments in technique can yield extraordinary results, both in convenience and culinary delight. By leveraging the power of a slow, cold fermentation, you invest just 15 minutes of active effort for a dough that develops superior flavor and texture overnight. The payoff is consistently soft, sturdy slices, versatile enough for any sandwich, toast, or alongside your favorite meal. This isn't just a recipe; it's a baking philosophy that frees you from the clock and introduces you to a more relaxed, rewarding way to enjoy fresh, homemade bread whenever the craving strikes. Dive in and discover the effortless joy of cool rise baking – your taste buds, and your schedule, will thank you.